7 Steps to Install Your Own Geothermal Loop
Share
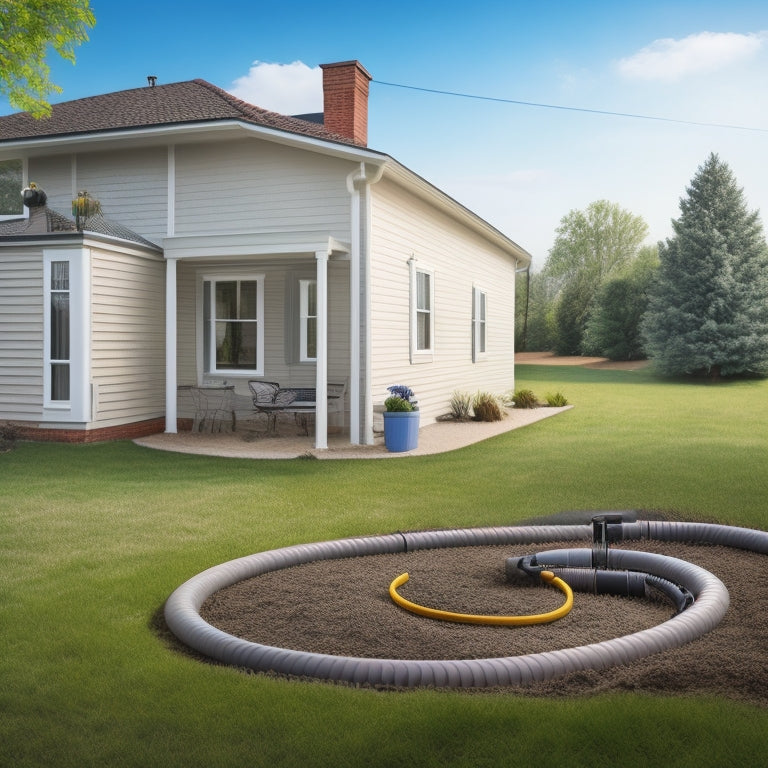
You'll initiate a multi-step process to install your own geothermal loop system, starting with site preparation and assessment to identify potential issues. Next, you'll drill boreholes, selecting pipes with high thermal conductivity and connecting them correctly to prevent leaks. After that, you'll plan the tubing layout, ensuring efficient heat transfer and minimal flow resistance. Then, you'll circulate fluid through the loop, testing for leaks and anomalies, before integrating it with your heat pump system. Insulation and burial of the loop come next, followed by final testing and commissioning to verify system efficiency. What you do next could make all the difference in optimizing your system's performance.
Key Takeaways
- Assess the site for soil conditions, underground utilities, and energy generation potential to inform drilling strategy and avoid potential problems.
- Choose pipe materials with high thermal conductivity, considering environmental impact, upfront costs, and compatibility with installation techniques and loop sizing.
- Design a well-planned tubing layout with correct pipe spacing and burial depth to facilitate efficient heat transfer and minimize flow resistance.
- Fill the loop with a suitable fluid, circulate it, and test for leaks, blockages, or anomalies to optimize loop performance and ensure system functionality.
- Integrate the loop with the heat pump system, selecting the correct pump and ensuring secure connections to facilitate efficient heat transfer and reduce corrosion risk.
Prepare the Site for Drilling
Clear the area around the proposed drilling site of any obstacles, debris, or vegetation that could interfere with the drilling process or pose a safety risk. You'll need a clean slate to guarantee a smooth operation.
Next, conduct an extensive site assessment to identify potential issues with soil conditions. Check for unstable ground, underground utilities, and water tables that could affect drilling. Take note of the soil's composition, density, and moisture levels, as these factors will influence your drilling strategy.
Considering the significance of energy storage and efficiency in renewable energy solutions, it's essential to assess the site's potential for energy generation and storage. A thorough site assessment will help you anticipate and mitigate potential problems, saving you time and resources in the long run.
Drill Boreholes for Loop Installation
How deep must your boreholes be to confirm ideal loop performance? The answer lies in the specific conditions of your site and the type of geothermal system you're installing.
Generally, boreholes should be drilled to a depth that allows the fluid in the loop to reach a consistent temperature, usually between 40°F and 70°F (4°C and 21°C). Moreover, integrating solar-powered energy storage solutions can minimize grid reliance and carbon footprint, especially during peak charging periods solar integration.
To guarantee excellent loop efficiency, consider the following factors during borehole drilling:
- Local groundwater levels: Drill below the water table to minimize the risk of contamination and confirm proper fluid circulation.
- Rock and soil formations: Account for varying thermal conductivity and density to enhance heat transfer.
- Loop configuration: Design your borehole layout to accommodate the specific loop pattern and pipe spacing.
- System sizing: Verify the borehole depth and spacing match the system's heating and cooling capacity.
Insert and Connect Pipe Segments
You'll need to select pipe segments that meet specific criteria, taking into account factors like material, diameter, and thermal conductivity.
Next, you'll connect these segments using methods such as mechanical couplings, welding, or brazing, ensuring a secure and leak-free joint.
As you prepare to insert the connected pipe segments into the boreholes, you'll also need to plan the tubing layout to optimize system performance and efficiency.
When designing your geothermal loop, it's crucial to evaluate solar-powered charging solutions and energy storage systems to enhance grid resiliency, which can be applied to your piping system to reduce energy waste and promote eco-friendly practices.
Pipe Selection Criteria
Pipe Selection Criteria (Insert and Connect Pipe Segments)
As the geothermal loop's performance relies heavily on the pipe's thermal conductivity, selecting the right pipe material is vital. You'll want to take into account the following key factors to guarantee ideal heat transfer efficiency:
-
Thermal conductivity: Choose pipe materials with high thermal conductivity, such as PEX, PE-RT, or HDPE, to maximize heat transfer between the earth and the fluid.
-
Environmental impact: Evaluate the pipe's eco-friendliness, as some materials may leach chemicals into the soil or groundwater.
-
Cost considerations: Balance the upfront cost of the pipe with its expected lifespan, maintenance requirements, and potential energy savings.
- Installation techniques and loop sizing: Verify the pipe material is compatible with your chosen installation method, such as horizontal trenching or vertical boreholes, and that the loop is sized correctly for ideal performance.
In line with achieving energy independence renewable energy solutions and minimizing reliance on fossil fuels, it's imperative to select a pipe material that aligns with your environmental goals.
Pipe Connection Methods
With the pipe selection criteria in place, it's vital to focus on connecting these pipes efficiently to guarantee a seamless geothermal loop system.
You'll need to ascertain that the pipes are properly connected to prevent leaks, corrosion, and other issues that can compromise the system's performance. When inserting and connecting pipe segments, take necessary safety precautions to avoid injuries and damage to the pipes.
It's important to take into account the installation costs and complexity of the project, which can range from $500 to $50,000+ commercial EV charging station installation costs, and plan accordingly.
Use appropriate connection methods, such as welding, brazing, or push-fit fittings, depending on the pipe material and system requirements. Verify material durability by selecting high-quality connections and following manufacturer instructions.
Proper connections will guarantee a reliable and efficient geothermal loop system that provides you with freedom from high energy bills and environmental concerns.
Tubing Layout Planning
By now, you've selected the right pipes and connection methods for your geothermal loop system.
Now it's time to plan the tubing layout. This vital step guarantees your system operates efficiently and effectively.
To achieve peak performance, consider the following key factors:
-
Loop depth: Confirm the pipes are buried at a sufficient depth to capture consistent ground temperatures.
-
Tubing materials: Choose materials that can withstand corrosion and are suitable for underground use.
-
Pipe spacing: Space pipes correctly to allow for efficient heat transfer and minimize flow resistance.
- System layout: Design the layout to accommodate your specific property and system requirements.
A well-planned tubing layout will result in a more efficient and cost-effective geothermal loop system, giving you the freedom to enjoy a sustainable and environmentally friendly heating solution.
Circulate Fluid to Test Loop
You've reached a critical stage in the geothermal loop installation process: circulating fluid to test the loop. This step guarantees the loop's integrity and identifies any potential issues before connecting it to the heat pump system.
Begin by filling the loop with a fluid that meets the necessary properties for geothermal applications, such as high thermal conductivity and low viscosity. Connect testing equipment, like flow meters and pressure gauges, to monitor the fluid's flow rate, pressure, and temperature.
Circulate the fluid through the loop, observing the readings to detect any leaks, blockages, or other anomalies. Record your findings to reference later, making adjustments as needed to optimize the loop's performance.
Connect Loop to Heat Pump System
You'll now connect the geothermal loop to the heat pump system, which requires careful attention to loop connection procedures to guarantee a secure and efficient integration.
You'll need to integrate the loop with the pump system, assuring proper fluid flow and pressure.
At the heat exchange points, you'll connect the loop to the heat pump's evaporator and condenser, facilitating the transfer of heat between the earth and the building.
Loop Connection Procedures
The manifold, an essential component in the heat pump system, awaits connection to the geothermal loop.
Now it's your turn to connect the loop to the heat pump system. This critical step requires attention to detail to guarantee a successful installation.
To connect the loop, follow these steps:
-
Identify the loop type: Determine whether you have a horizontal, vertical, or pond loop to guarantee proper connection procedures.
-
Prepare the manifold: Clean and inspect the manifold for any debris or damage before connecting the loop.
-
Connect the pipes: Use proper fittings and connections to join the loop pipes to the manifold, guaranteeing a secure and leak-free connection.
- Test the system: Perform a pressure test to verify the connection is secure and the system is functioning as expected.
Pump System Integration
With the geothermal loop connected to the manifold, it's now crucial to integrate the pump system into the heat pump system to facilitate efficient heat transfer. Proper pump selection is critical to guarantee peak system efficiency. You'll need to take into account factors such as flow rate, head pressure, and power consumption when choosing the right pump for your system.
| Pump Selection Criteria | Description |
|---|---|
| Flow Rate | Matches system's required flow rate |
| Head Pressure | Meets system's pressure requirements |
| Power Consumption | Optimizes energy efficiency |
Heat Exchange Points
During system integration, connecting the geothermal loop to the heat pump system at designated heat exchange points is critical for efficient heat transfer.
You'll want to confirm that these connections are secure and properly insulated to maintain loop efficiency.
To achieve ideal heat transfer, consider the following key aspects:
-
Loop piping insulation: Confirm that all piping is well-insulated to minimize heat loss.
-
Connection tightness: Verify that all connections are secure and tightened according to manufacturer specifications.
-
Flow rates: Adjust flow rates to optimize heat transfer and prevent corrosion.
- System monitoring: Regularly monitor the system to detect any potential issues that could impact heat transfer.
Insulate and Bury the Loop
You'll need to insulate and bury the geothermal loop to prevent heat loss and guarantee efficient system operation. This step is vital to maintaining the overall performance of your system. There are various loop insulation techniques you can use, including foam pipe insulation, foam board insulation, and multi-layer insulation. The choice of insulation will depend on your specific climate and soil conditions.
| Insulation Type | Thickness | R-Value |
|---|---|---|
| Foam Pipe Insulation | 1-2 inches | R-2 to R-4 |
| Foam Board Insulation | 1-2 inches | R-4 to R-8 |
| Multi-Layer Insulation | 2-4 inches | R-8 to R-16 |
When it comes to loop burial depth, you'll want to take into account factors such as soil temperature and moisture levels. A general rule of thumb is to bury the loop at a minimum of 4-6 feet below the earth's surface. This will help guarantee consistent soil temperatures and minimize heat loss.
Final Testing and Commissioning
Now that the geothermal loop is properly insulated and buried, it's time to verify its operation and performance.
You've invested significant time and resources into this project, and it's crucial to confirm your system is running efficiently and effectively.
To confirm system performance, follow these steps:
-
Check the system's energy efficiency: Verify that the system is operating within the expected energy efficiency range.
-
Monitor system pressures and temperatures: Ascertain that pressures and temperatures are within the recommended specifications.
-
Perform a series of heat pump tests: Run the system through various modes to validate it's functioning as expected.
- Review system performance data: Analyze data to identify any potential issues or opportunities for improvement.
Frequently Asked Questions
Can I Install a Geothermal Loop in Areas With High Water Tables?
As you venture into the world of geothermal energy, you'll face a vital hurdle: steering through areas with high water tables. Be prepared to tackle water table considerations and installation challenges head-on, ensuring a successful and efficient geothermal loop installation.
How Long Does a Geothermal Loop Typically Last?
You'll be thrilled to know that a well-maintained geothermal loop can last up to 50 years or more, with a typical geothermal lifespan ranging from 25 to 40 years, depending on loop maintenance and environmental factors.
Are Geothermal Loops Compatible With Radiant Floor Heating?
As you weave a warm, cozy blanket of comfort around your home, you'll find geothermal loops harmoniously entwined with radiant floor heating, unfastening installation benefits and energy efficiency, giving you the freedom to revel in sustainable, eco-friendly warmth.
Can I Use PVC Pipes Instead of HDPE for the Loop?
You're considering using PVC pipes instead of HDPE for your geothermal loop; while PVC pipes offer advantages like corrosion resistance and lower cost, they may not be suitable due to HDPE's superior durability and resistance to cracking under high pressure.
Do I Need a Backup Heating Source With a Geothermal System?
When you're flying solo with a geothermal system, you'll want a backup heating source in your back pocket, considering the cost considerations and maintenance requirements, to avoid getting left out in the cold on a chilly winter night.
Related Posts
-

Smart Energy: Greener Homes With Connected Power Devices
You can control and optimize your energy consumption with smart energy devices, reducing your carbon footprint by up ...
-

10 Grid-Tied Wind Power Systems for Modern Homes
You're looking for a grid-tied wind power system to utilize wind energy for your modern home. Here are ten options to...
-

10 Green Waste Solutions Every Homeowner Should Know
You can make a significant impact on the environment by implementing green waste solutions at home. Consider composti...


